
Outpost Building & Layouts
Build tight: cluster production next to its input, keep pipes and conduits short, and put shield emitters around the core rather than the edges. Every structure you place is a permanent upkeep line.
Building in Star Trek: Outposts Unknown is a placement problem disguised as a shopping problem. You can unlock 36 structures, but the ones that decide whether an outpost thrives are the boring ones: the utility spine, the storage, and the repair access.
The four categories worth knowing
The game's own achievement for "a building from every category" implies a category system, and in practice you will build across four families.
| Family | Examples | Role |
|---|---|---|
| Command | Ops Center | Level ceiling, crew coordination, upgrade gate |
| Production | Metal collector, refinery, processors | Turns terrain into material |
| Utility | Water, power, compute, conduits, network | Keeps everything else running |
| Support | Quarters, mess hall, medical, recreation, storage | Keeps crew functional and stock organised |
Defense is a fifth practical category — shield emitters and perimeter structures — and it behaves differently because it is sized against a threat rather than against throughput.
The Ops Center is the spine
Everything scales off the Ops Center. It upgrades in stages, it wants materials delivered to it, and upgrading it is what raises the ceiling on the buildings around it. Three Ops Centers at level 10 is an achievement, which tells you the intended late-game shape: multiple outposts, each with its own centre, rather than one megabase.
Build the Ops Center near the geographic middle of the outpost you intend to have in an hour, not the one you have now. Moving it later is expensive, and half your logistics is measured from it.
Keep the utility spine short
Pipes and conduits take up space. That single sentence governs more layout decisions than any other rule in the game: every metre of conduit is a metre you cannot build on, and every building further from the spine is a longer repair walk.
The pattern that works:
- Put water, power and compute in a tight cluster at one edge of the plateau.
- Run one trunk line through the middle of the buildable area.
- Place production buildings along the trunk, input side facing their resource.
- Put support buildings behind the trunk, out of the hauling path.
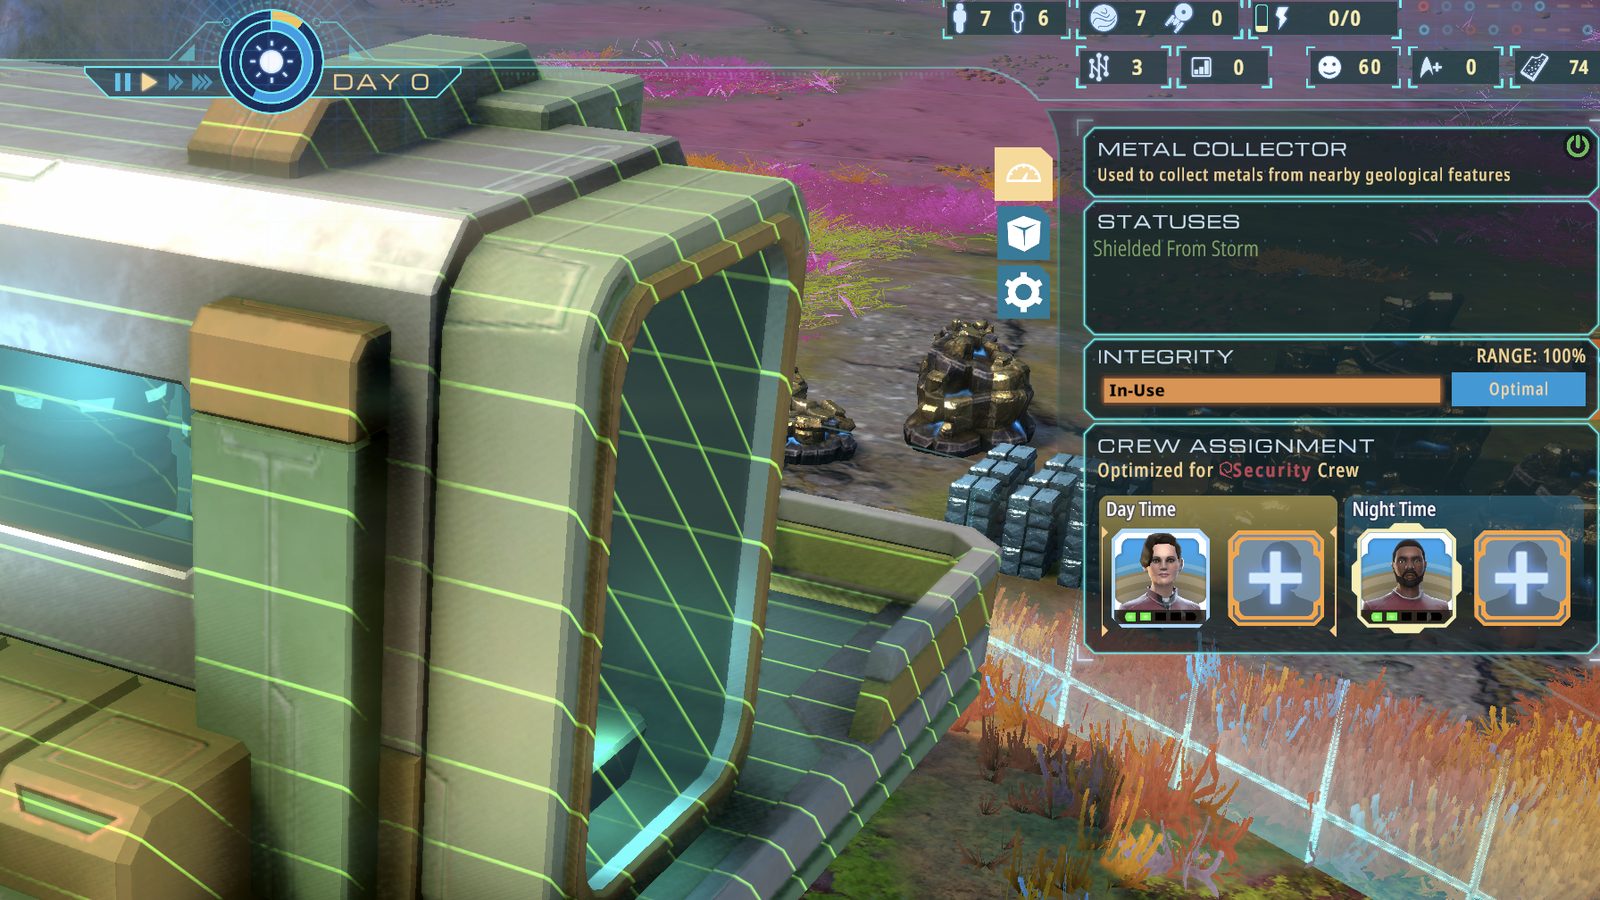
A building tooltip shows integrity, range and day/night staffing. Official media: Magic Fuel Games / Playstack.
Every structure you place is an upkeep line
Buildings consume water, power or compute continuously, and the ones that go without slide toward system failure. Failure is not a single event — it is a state that stops production, damages integrity and eventually needs an engineer.
So the correct question before placing anything is not "can I afford this" but "can I afford this forever". A building you cannot feed is worse than no building: it occupies space, consumes crew attention and drags your repair queue.
Shield emitters: where and how many
Shield emitters protect the outpost and its crew from Tetryon radiation, and they are the most expensive thing you will build in the mid-game because they need processed rare materials.
Placement rule: shield what you cannot afford to lose and cannot easily rebuild — the Ops Center, the compute cluster, crew quarters. Shielding the perimeter looks thorough and wastes coverage, because the emitter's value is the crew inside its radius, not the fence.
Five emitters is an achievement, and five is also roughly what a mature two-cluster outpost needs to keep radiation out of the working areas.
Upgrades beat sprawl
Buildings can be upgraded, and 18 of them can go to maximum level. Upgrading an existing building gives you more output for the same footprint and the same conduit run; building a second one doubles the upkeep and the walking.
That is why the strongest mid-game move is usually to stop expanding and spend two in-game days upgrading. It looks like nothing is happening. It is the difference between an outpost that supports a second planet and one that cannot spare a shuttle.
Layout checklist
| Check | Why |
|---|---|
| Ops Center central to the planned base | Everything is measured from it |
| Utility cluster on one edge | Shortest possible trunk line |
| Production facing its input | Cuts haul distance |
| Support behind the trunk | Keeps hauling lanes clear |
| Repair access to every corner | Engineers walk, not teleport |
| Shields over crew areas, not fences | Radiation hurts people, not walls |
| Storage near production, not near command | Hauling economy |